CompuTec PDC (Plant Data Capture) connects your factory floor to CompuTec ProcessForce and SAP Business One via mobile devices. We have customers in a wide range of industries, and each of them has unique ways of running production, so that means there also needs to be flexibility in their IT environment. CompuTec PDC is really easy to customize for individual businesses’ needs, and in this blog, we’ll give you a quick guide on how to do that.
There are a number of ways to customize CompuTec PDC, including:
- Form Settings
- Task Tile and Task Panel customization
- Customizing Task Panel icons
- Customizing the default view
Let’s take a look at these one at a time.
Form Settings
To customize CompuTec PDC in the Form Settings, this must first be activated for the relevant employee on Employee Master Data. This is set up like this to prevent unauthorized staff from making changes which might cause issues for the smooth running of your facility. You can do this by checking “PDC Form Settings Enabled” as shown below.
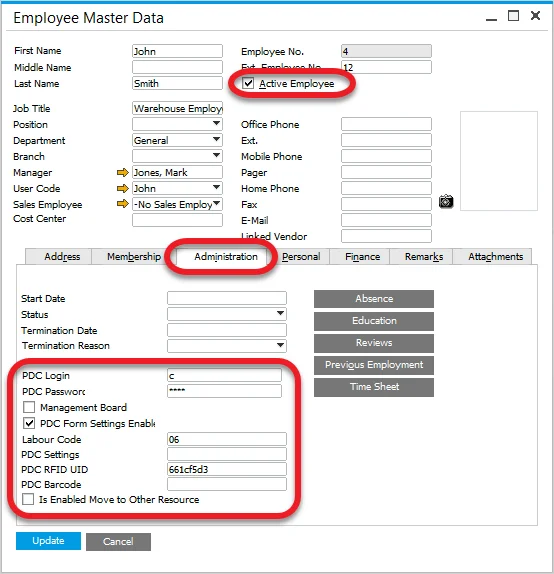
Now that we have authorization to perform customization, we can use the Form Settings to set up which columns we want to display on the Select Task–Resource tab and the Task Panel on the following forms:
- Details section
- Operation Bind
- Operation Properties
- Resource Properties
- Item Details
- Tools
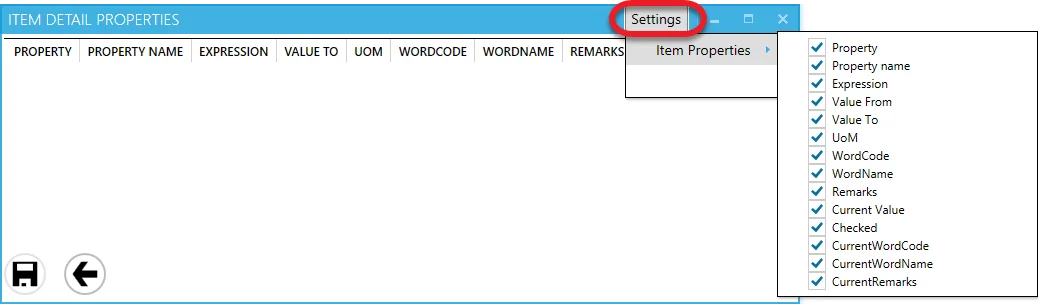
To determine which columns are displayed, simply select “Settings” on the title bar of the above forms and, as shown below, check the checkboxes appropriate to the columns you want to display.
Task Tile and Task Panel Customization
Activating Task Tile and Task Panel customization is also very simple. On the login screen, just click and hold down the left Shift + Ctrl + Alt keys as you click the login button.
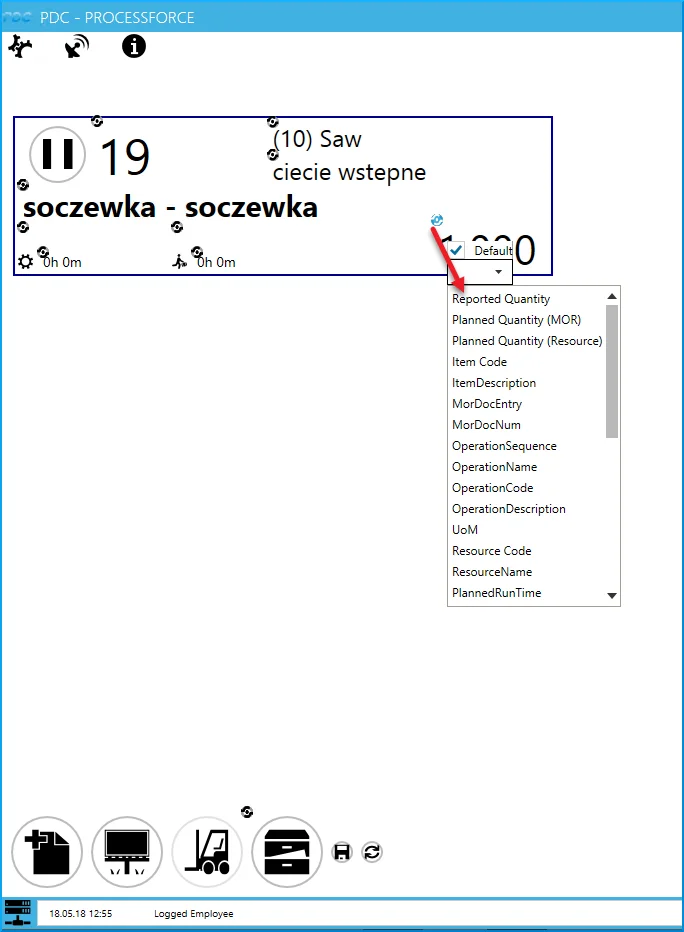
After doing this, you will be able to choose what values are to be displayed on different places on the Task Tile by clicking on the Change icon as indicated below. Uncheck the “Default” checkbox and choose the desired value from the drop-down list. If you want to revert to the default values, just re-check the Default checkbox.
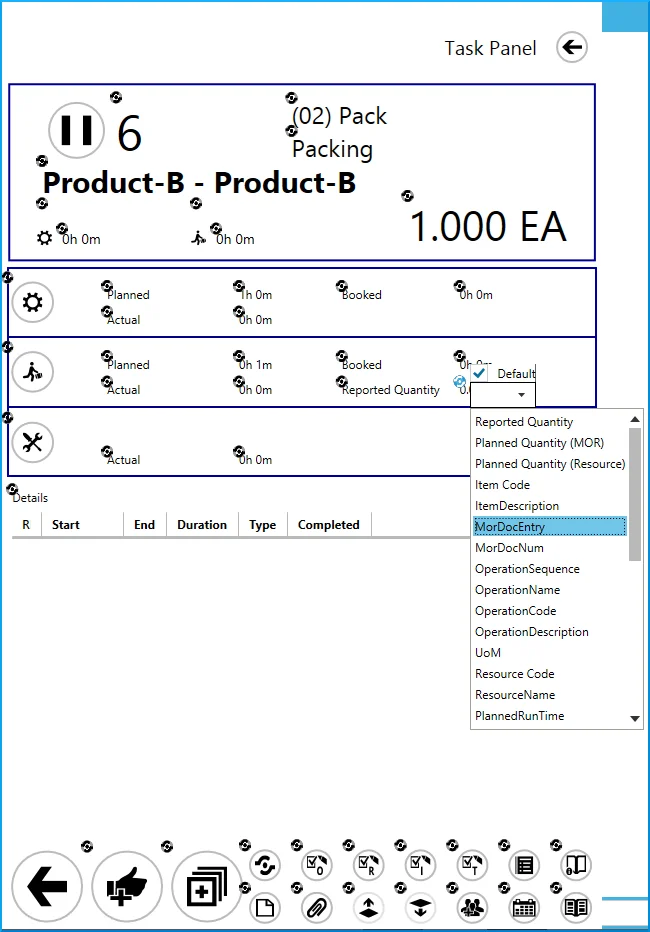
This works in exactly the same way on the Task Panel too.
Customizing Icons on the Task Panel
The icons on the lower part of the tile, which you can see above, are customizable too. You can assign actions other than the defaults to them if you wish. You can also hide one or more buttons by unchecking the Default IsVisible checkboxes.
Additionally, it is possible to assign the Quick Receipt action to any of the buttons. You can choose the option from the drop-down list for the relevant button.
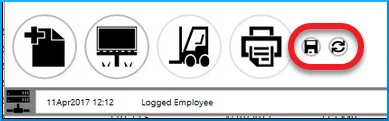
Finally, click the save icon (the left one on the screenshot below) to save your setup. If you want to revert to the default values, just click the rollback icon (the right one on the screenshot).
Customizing the Default View
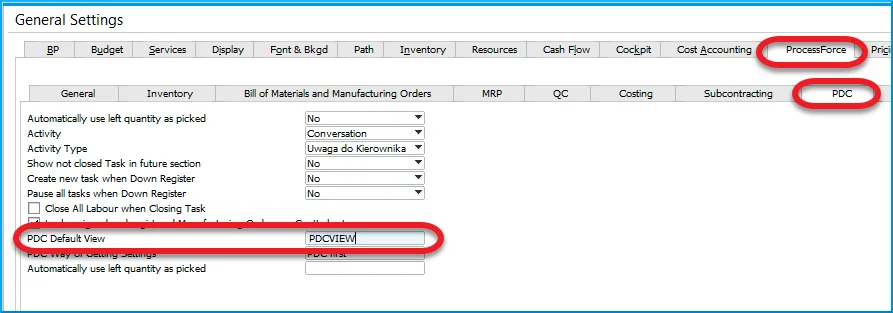
You can use the SQL views option to add other values to drop-down lists. This one requires a little more specialized knowledge than the other customization methods, as it is done using SQL queries; however, if you know some basics of SQL, it is also very straightforward. To do this, you have to define the view in the database and enter its name in the PDC Default View field in the CompuTec ProcessForce General Settings, as below.
You can see a more detailed example of how to achieve this in the CompuTec PDC documentation.